多图翻译加整理测试:英中对照:Odoo报表入门Step by Step,Odoo创建一份报表到打印下拉菜单中
在Odoo8.0 中测试成功。
原文来自:Multiple report layout step by step
转载请注明出处,谢谢
-
多图翻译加整理测试:英中对照:Odoo报表入门Step by Step,Odoo创建一份报表到打印下拉菜单中
-
卓忆翻译:英中对照:Odoo报表基础
-
卓忆翻译:英中对照:Odoo报表设计进阶篇
-
卓忆翻译:写模块进行Odoo Qweb报表的继承和修改
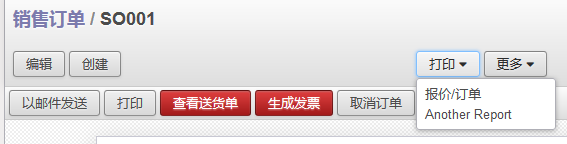
How to implement another report in the print drop down menu? (e.g. like this for sale orders)
怎样 实现 在 打印 下拉菜单 里面 增加 另外一个 报表。(比如 在销售订单 的 打印 这里)
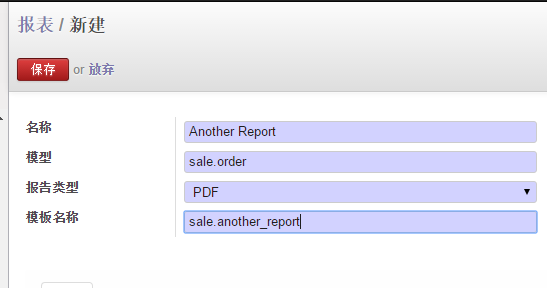
STEP #1 – create a new report 第一步: 创建一张新的报表
Goto Settings > Technical > Reports > Reports, create a new report and fill out the four mandatory fields:
去 设置- 技术- 报表-报表 ,创建一张新报表 填写 下面 4个 区域的内容:
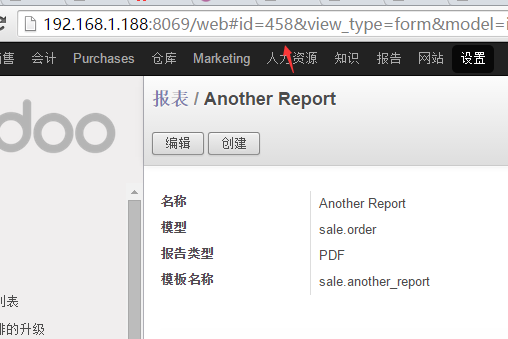
After saving this report please have a look in your browser address bar. There you can easily see the report’s id (something like “#id=1234″) – you need this id for a later step.
保存报表时,看一下浏览器中的地址栏,您可以发现报表的Id (类似 id=458) ,最后一步(第四步)时,您需要
用到这地址
STEP #2 – create a new view 第2步: 创建一个新的视图
Goto Settings > Technical > User Interface > Views, create a new view and fill out following fields:
设置-技术-用户界面-视图 ,创建 一个新的 视图,填写下面的区域:
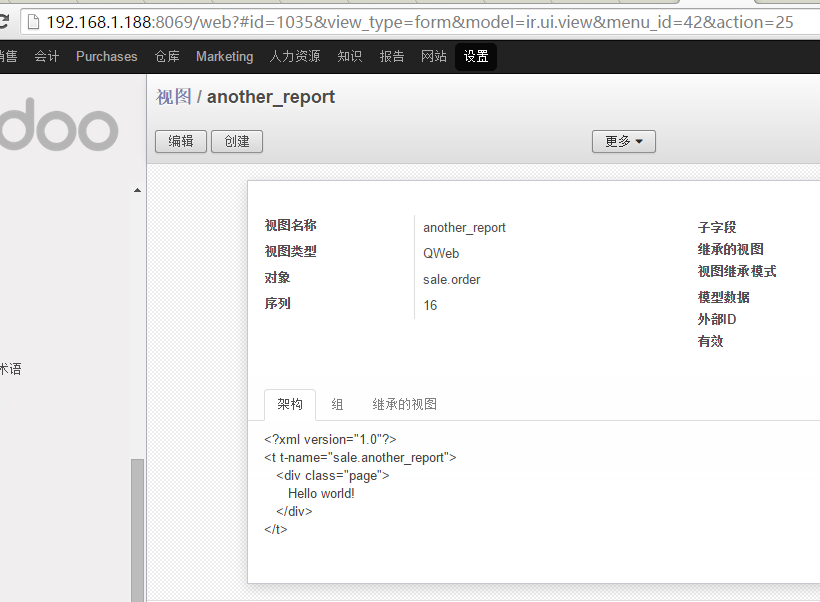
架构这里 填写:
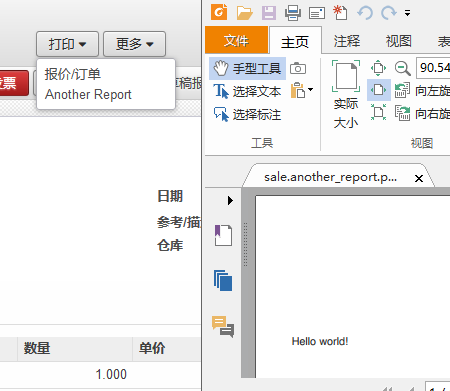
<?xml version=”1.0″?> <t t-name=”sale.another_report”> <div class=”page”> Hello world! </div> </t>
提示:其实这里可以直接复制本来的 销售订单的 报表。现在这样,打印出来的another_report 就是Hello world!.
注意:<t t-name=”sale.another_report”> 这里不要填错
When View Name is the same as in Template Name (from STEP #1) Odoo automatically associates this view to the given report.
当视图名称和 (第一步的)模版名称相同时Odoo 自动关联这个视图到报表。
After saving this view have a look in your browser address bar. There you can easily see the view’s id (something like “#id=1234″) – later you will need this id.
保存这个 视图 时,观察下浏览器 ,记录下 这个 视图的id (比如:1035) 注意 这个 id 是用于 第三步的。
STEP #3 – create a new identifier 步骤3 – 创建一个新的id
Goto Settings > Technical > Sequences & Identifiers > External Identifiers, create a new identifier and fill out the following fields:
设置-技术-序号和标识-外部标识,创建一个 新的 id 标识,填写下面的区域:
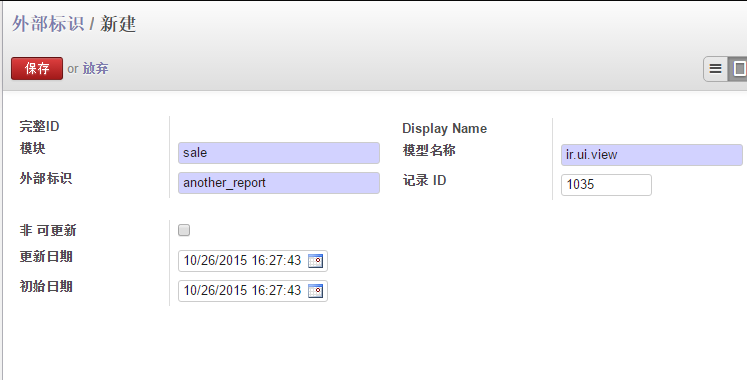
Record ID is the view id you found in STEP #2 这个 id 是填写 第二步时的 id (比如1035,id不是这个)
STEP #3 – create a new identifier 步骤4:创建一个 新的动作绑定
Goto Settings > Technical > Actions > Action Bindings, create a new action binding and fill out following fields:
设置-技术-动作-动作绑定 创建一个 新的 动作绑定,填写下面的区域
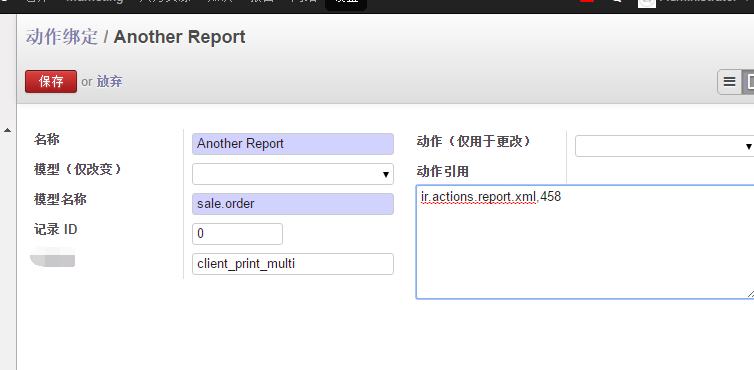
Qualifier 是 限定 在 client_print_multi
The number specified in Action Reference is the report id you got in STEP #1
动作引用 这里的 id是填写步骤1的 id.
动作引用这里: ir.actions.report.xml,458 (注意这个id 是第一步时看到的报表的id)
就这样成功了:
转载请注明出处,谢谢。
扩展阅读:
How to enable qweb editor when printing reports
要特别注意 : 第一步 创建报表时 保存后 ,浏览器中看到的 id 是 第四步 创建 动作绑定用,
第二步 创建 视图 浏览器中看到的id 是 第三步 创建 外部id 用的。
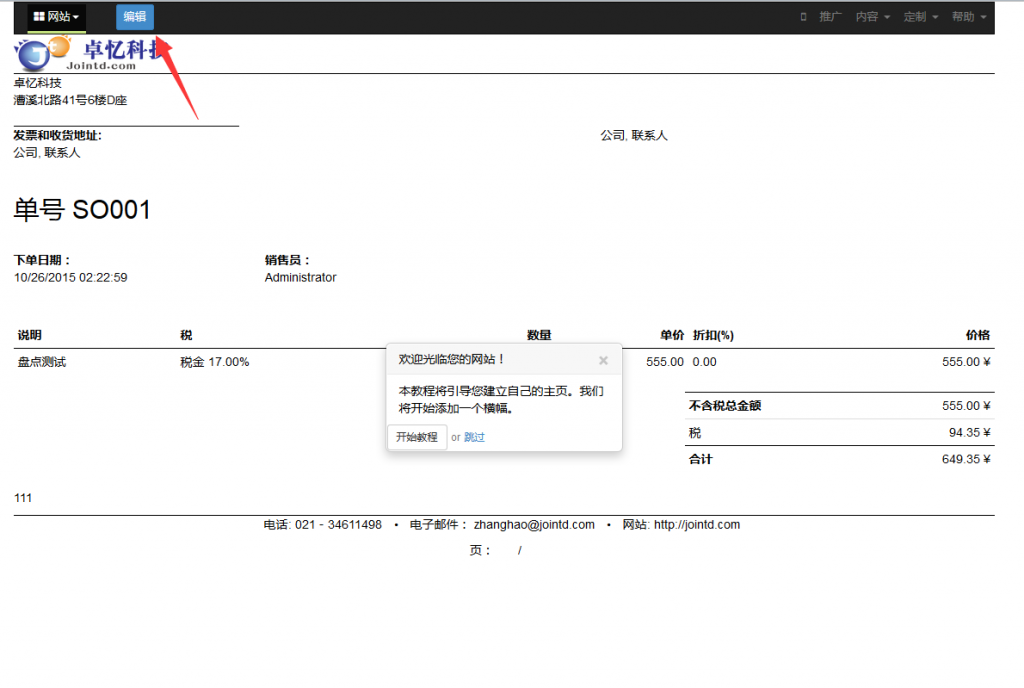
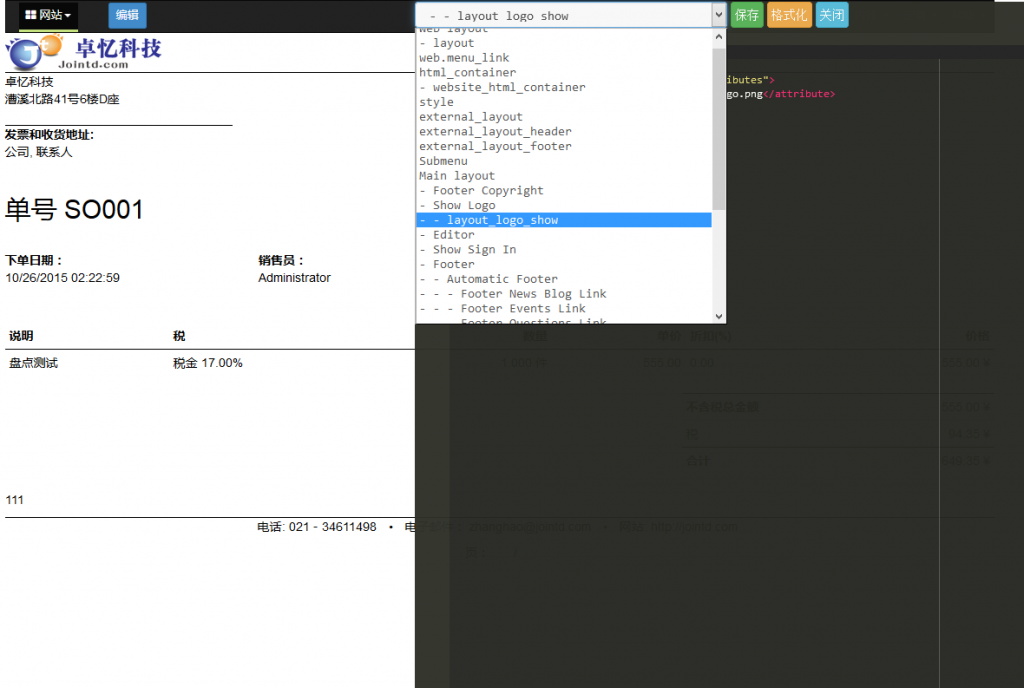
另外,odoo8.0 报表还可以 以所见即所得的方式 在线 编辑。
1:更改需要编辑的报表的方式 为html, (注意,编辑之前推荐备份此报表)

2:安装 website 的模块,
3:再打印这个报表 ,就可以 像编辑odoo的网站一样编辑 报表了。
谢谢 OpenERP- 应用群 212904 中 台湾台北-Jason 提供的教程链接。